

The aim of this lab is to learn how to setup Google SSO Authentication in Grafana and also how to demonstrate how fast we can spin up a new Grafana instance using the official docker container (no need to create custom images). If you are looking on how to setup LDAP authentication you can check this post.
In Geko we decided to implement SSO with most of our internal services since we already work with Gsuite accounts, so it was the obvious way to go. Anyway you can keep the default user management functional if you still want to use it.
Using SSO also makes it a lot easier for us when there are new incorporations in our team since they can sign up straight forward and we just need to set roles for them afterwards. Even for our clients we can allow their domains to set up accounts for them, if needed.
Estimated time to finish this lab: 20-30 minutes
Setup Google Cloud account
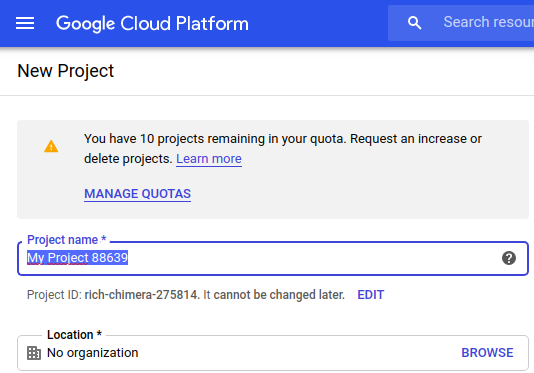
To set up SSO we need to create some credentials in Google Cloud. If you don’t have a project created in GCP you will have to create one: https://console.cloud.google.com
Oauth consent screen
The consent screen is what users will see when they try to login to your application (Grafana). You can use this link to get to the configuration: https://console.cloud.google.com/apis/credentials/consent/edit?
Here we can set some parameters to customize our consent screen. We are going to set the following values for this lab:
- Application name: Grafana
- Support email: Your email or any mail associated with your account
- Authorized domains: These are the domains against which your users will be able to authenticate. You will usually use your organization domain name but you might be interested in allowing others too.
As you can see the configuration is pretty straight forward. If you want to set any other parameter feel free, it’s up to you.
Creating credentials
We will now set up the credentials that will be used in Grafana to authenticate against our Google Cloud project: https://console.cloud.google.com/apis/credentials?
- Click on “CREATE CREDENTIALS” and then “Oauth Client ID”.
- Select “Web application”, set the name to “Grafana“ and click “Create”
Next, you will see a popup window with the following information:
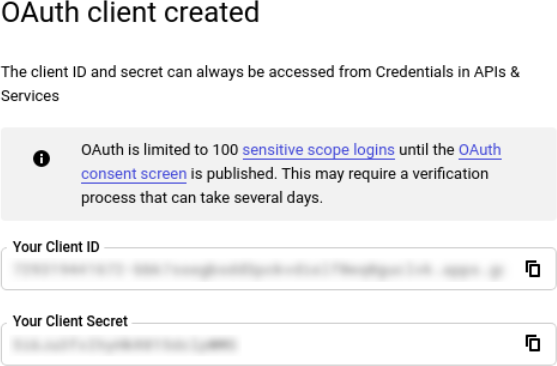
Warning! Store your Client ID and Client Secret in a secure location.
Setup Grafana
I assume you already have setup docker service in your local machine. If you have not, get started here: https://docs.docker.com/get-docker/
Persistent volume
Even if we do use docker we want to have persistent data so any modification in configuration or dashboards will not get lost even if we kill the container. This makes upgrades to newer versions really easy and less painfully. So go ahead and create a volume for Grafana:
docker volume create grafana-data
Prepare the arguments to setup Grafana
We are going to spin up the Grafana container using some environment variables to setup Grafana. Here we will describe what is each one for:
- GF_SECURITY_ADMIN_PASSWORD: Strong random password
- GF_SERVER_ROOT_URL: Set this if you want to override the server root. Otherwise you can remove this parameter. Useful if you run Grafana behind a reverse proxy (for example nginx) and need to access a specific uri.
- GF_AUTH_GOOGLE_ENABLED: Enable Google SSO
- GF_AUTH_GOOGLE_AUTH_URL: Self explanatory
- GF_AUTH_GOOGLE_TOKEN_URL: Self explanatory
- GF_AUTH_GOOGLE_CLIENT_SECRET: Client Secret that we obtained when we created the credentials in GCP
- GF_AUTH_GOOGLE_CLIENT_ID: Client ID that we obtained when we created the credentials in GCP
- GF_ALLOWED_DOMAINS: Your company domain and every other domain you want to grant access to (for example your clients)
We can of course set all these parameters in grafana.ini instead of using environment vars, it’s your choice which method to use.
Start Grafana container with our custom arguments
We can now spin up our container. Note that we are mapping the Grafana port to our host 8081 port:
docker run -d --rm -p 8081:3000 --name grafana
    -e "GF_SECURITY_ADMIN_PASSWORD=<some_password>"
    -e "GF_SERVER_ROOT_URL=http://"
    -e "GF_AUTH_BASIC_ENABLED=<disable_default_auth>"
    -e "GF_AUTH_GOOGLE_ENABLED=<enable_google_auth>"
    -e "GF_AUTH_GOOGLE_AUTH_URL=https://accounts.google.com/o/oauth2/auth"
    -e "GF_AUTH_GOOGLE_TOKEN_URL=https://accounts.google.com/o/oauth2/token"
    -e "GF_AUTH_GOOGLE_CLIENT_SECRET=<your_client_secret>"
    -e "GF_AUTH_GOOGLE_CLIENT_ID=<your_client_id>"
    -e “GF_ALLOWED_DOMAINS=<your_company_domain>”
    -v grafana-storage:/var/lib/grafana
grafana/grafana
If everything is fine you should be able to access grafana at http://localhost:8081 and will see a button to authenticate with Google:
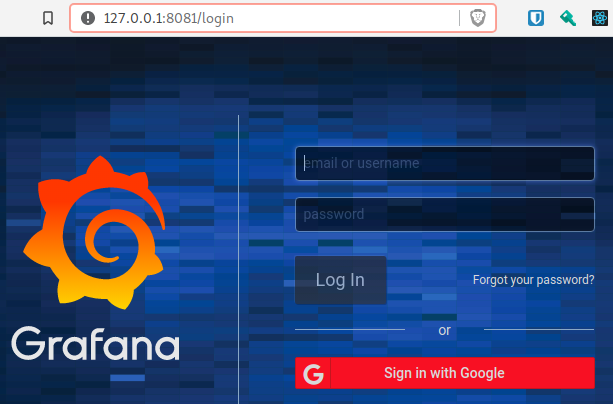
If you try to sign in with a gmail account that belongs to an allowed domain you should be able to access Grafana now.
I hope you’ve enjoyed this post and I encourage you to check our blog for other posts that you might find helpful, such as “What is the kubernetes?“. Do not hesitate to contact us if you would like us to help you with your projects.
See you in the next post!