

Kubernetes is a container orchestrator and therefore you need somewhere to store your container images for Kubernetes to pull them. There’s a wide variety of managed and unmanaged solutions to choose from this matter: cloud registry, dockerhub, private registry on a vm… or a private registry in Kubernetes.
Today we are going to cover the latter. A solution to deploy a registry inside Kubernetes itself: Harbor.
But what is Harbor?
Harbor is open-source and is part of the Cloud Native Computing Foundation. It implements some basic functionalities like a role-based authentication (with support for LDAP) and also ships with some interesting more advanced features like the ability to upload and store helm charts, perform vulnerability scans on the uploaded images, and much more.
Enough talk, I want a hands-on!
Let’s see how can we implement Harbor in our cluster. I assume you are meeting the following requirements:
- You have a working k8s cluster with ingress-controller. Minikube is acceptable.
- You have helm installed (read how to install helm)
- You have the docker client installed
- 10 spare minutes 😉
IMPORTANT: You should have cert-manager installed in your cluster since Harbor requires to have a valid HTTPS certificate to login with docker from your terminal.
Installing Harbor
We are going to use the official helm chart for this part. To do this, you will need to add the harbor repo first:
helm repo add harbor https://helm.goharbor.io
To customize your deployment you can create a new values.yaml file, replace it with your desired contents:
expose:
  type: ingress
  tls:
    commonName: "YOUR_CN"
  ingress:
    hosts:
      core: "harbor.YOUR_DOMAIN"
persistence:
  enabled: true
externalURL: "https://harbor.YOUR_DOMAIN"
harborAdminPassword: admin
Now create the namespace and deploy the chart. The values used for the deployment will vary depending on your needs:
kubectl create harbor-system
helm install --wait harbor --namespace harbor-system harbor/harbor -f values.yaml
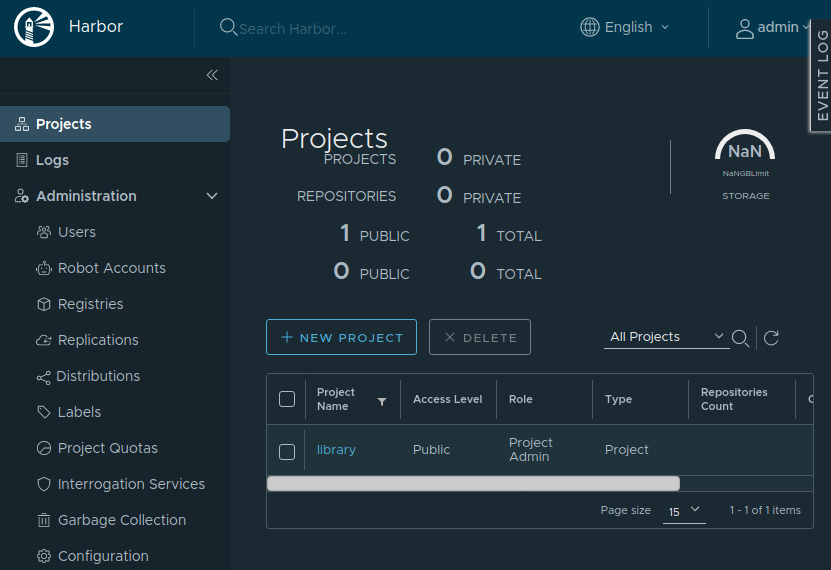
After install finishes (can take up to 5 minutes) you can go to the domain using your web browser and log in to harbor with the admin username and the password you previously defined. Should end up on this screen:
Pushing your first image
First, you will need to login to the registry from your terminal by using the docker login command and entering your credentials:
docker login https://harbor.YOUR_DOMAIN
*Note that in order to access harbor through this domain you must create the appropiate DNS entry in your DNS manager AND is mandatory to have a valid HTTPS certificate
Click the “NEW PROJECT” button and fill the inputs:
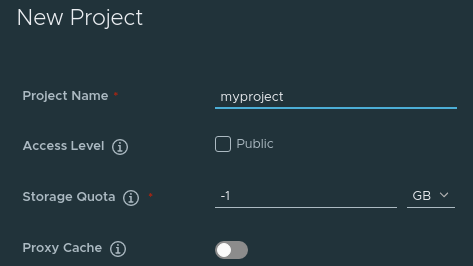
After clicking OK you should be able to see your new project on the main screen.
Now, let’s try to upload a new image to this project. Pull the official nginx image, tag it with your harbor/project and push it:
docker pull nginx
docker tag nginx harbor.YOUR_DOMAIN/myproject/nginx:latest
docker push harbor.YOUR_DOMAIN/myproject/nginx:latest
If everything went fine, you should see the nginx image inside the project you created in harbor:

What’s next?
You have deployed a new private Harbor registry and you already uploaded your first image.
In the next post of this series, we will cover how to create the required credentials for your pods to be able to pull the images from your private Harbor and how to tell Kubernetes when and how to use those credentials.
I hope you’ve enjoyed this post and I encourage you to check our blog for other posts that you might find helpful. Do not hesitate to contact us if you would like us to help you on your projects.
See you on the next post!